Saturday, 27 August 2016

Open Sesame: RFID, Door controller and some electronics

Controlling access to your organisations premises and to security zones within them is an important part of an Information Security Management System. Access control is part of the PCI DSS and ISO27001 and the subject of access control is part of the CISSP from the (ISC)2 Common Body of Knowledge. Access to facilities should be based on the principles of business need to know and least privilege; all those that need access should have access and they should only have the level of access they need to do their job. It is a requirement of most standards that access is controlled and logged and there is a range of solutions from Security Guards to sophisticated ‘mantrap’ entry portals.

A requirement of access control is that it should be proportional to the risk and impact; be transparent to the users whilst meeting the requirements of the company in terms of compliance.

Increasingly these days technology is being deployed to provide the solutions. Biometric solutions are not always transparent to the user, provide the level of convenience required and can be costly, mechanical locks such as cypher locks are also not transparent enough to the user or convenient and it can be difficult to change keys or codes and distribute the news across an organisation in timely manner, it is not a solution that scales well. A popular solution is the contactless entry card system that is based on Radio Frequency Identification (RFID) or Near Field Communications (NFC) technology. Such systems allow organisations to distribute key cards or tokens to employees and trusted 3rd parties and individual credentials can be revoked without affecting the whole population of users. Being wireless based the cards or tokens only need to be in proximity to the reader provider high levels of convenience whilst provider unique identification and accountability with entry and potentially exit logging.

Such systems can be easily purchased from eBay, Amazon to various system installers and can vary from individual door locks to enterprise systems. Those systems that rely on wireless communication to provide identification and authentication whilst being convenient and transparent to users are also subject to attack due to the nature of wireless communication being able to be intercepted and some systems being designed in an insecure manner.

Since April 2014 as part of talks that I have been giving to branches of the BCS and at universities and for other organisations we demonstrate attacks on door access control systems.

The demonstration shows 2 types of attackers on the door access system.

  • Compromising the door controller
  • Attacking the tokens


The door controller was purchased from Amazon and using information obtained by Googling components and other information it was possible to compromise the system in a number of ways.

Compromising the door controller


In this attack physical access to the door controller is required in order for the access codes to be captured. The proximity door controllers have a number of elements.
  • RF circuit
  • Micro-controller
  • Door latch controller
In the attack we demonstrate we intercept the signals from the RF circuit as they are being passed to the Micro-controller allowing us to read and capture authentication codes transmitted to the door controller so that we can then record and replay them back to the controller at a later time or use them in a cloned token.

By soldering some pins to the circuit board it was possible to capture the stream of binary data from the RF circuitry. Initial work was done with an Arduino, however small systems such as the Teensy could be used.


It was possible to capture the codes which could be stored or if a wireless adapter was added to the system they could be transmitted to a nearby laptop.

A small enough device could be attached to a controller and the controller then fitted back on the wall and the compromised controller could be used to capture legitimate users access tokens allowing them to be used in an attack.

Attacking the tokens


Proximity door controllers work by having a microchip connected to a coil, when the coil is moved through a magnetic field it generated a voltage which powers the microchip which then modulates a signal through the coil which can be picked up by the receiver which generated the initial magnetic field.

It is possible using simply electronics and a micro-controller like an Arduino to replicate either the access controller or spoof a token.


In the attack we demo, we do both. A coil, simple electronics and an Arduino are used to simulate an access controller. Any token in range of the spoofed access controller will transmit their codes which can be recorded by the Arduino.

The exactly same circuit can then be used to spoof a token and replay the captured codes back to a genuine door controller allowing a user to be spoofed and the door controller to be tricked into opening. By using a micro-controller board, it can be programmed to use the captured code as a base for a brute force attack on all tokens by transmitting modified codes and seeing if the controller responds.

Conclusion


These are simply attacks that work on unsophisticated controllers; however the principles can be used for more sophisticated attacks that would work on more advanced controllers. Unless a system has been designed with security in mind it is often easy to attack those systems.


Sunday, 7 August 2016

Micro:bit programming

As a bit of an update to the BBC Micro:bit post from the 6th August 2016

In the post I mention some resources for programming the Micro:bit, here I have added some additional resources.

The Micro:bit SBC can be programmed from applications running within a web browser
Additionally there is an App from Samsung to programme the Micro:bit from an Android phone 
For the Apple fans


Also Microsoft are developing a Windows 10 App to access the Micro:bit

Additional resources


Lancaster University have a number of resources on using and programming the Micro:bit, they are responsible for creating and writing the BBC micro:bit runtime. And have C\C++ tools that can be used to programme all the features of the board.

ARMmbed are also a partner and have resources that work with the other partners including Lancaster University


As I find other resources I will update this post

Saturday, 6 August 2016

BBC Micro:Bit

As part of looking at the capabilities of the BBC Micro:bit Single Board Computer (SBC) I have put together the following using the Inventor's kit from Kitronic.


BBC Micro:bit (Display side)

BBC Micro:bit (Component side)

The board can be programmed from applications running within a web browser

The Inventor's board adds an easy interface for a breadboard and comes with 10 tutorials

Kitronik Inventor's kit
One of the tutorials in the kit is an experiment that lights different colour LED's as a capacitor charge as per the table below. The rate of charging can be varied using a potentiometer and there are two switches that enable charging or discharging of the capacitor.

LED
Charge capacity
Red
25% -> 50%
Orange
50% -> 75%
Yellow
75% -> 90%
Green
90% -> 100%

Capacity charging experiment
The experiment whilst fine as is, could be improved and here are my improvements.

Improvement 1 - Monitor discharge


The experiment is about charging, but if the circuit is left the charge leaks from the capacitor and the percent charge drops, however the current programme does not show this discharge and the LED's don't turn off until the second switch is pressed and the capacitor discharges.

I modified the supplied programme to reflect this allowing the monitoring of charging and discharge to take place.

Modified Touch Develop Script

Improvement 2 - Adding serial data


The first improvement is not exactly rocket science but adds an extra element in the experiment to demonstrate charging and discharging of the capacitor.

The BBC Micro:bit can output serial data to to a host PC via the USB connection. It requires a drive from mbed. The instructions can be found on the coding the microbit site

You must install a device driver (for the computer to recognise the serial interface of the micro:bit); then, you must also install a terminal emulator (which is going to connect to the micro:bit and read its output).

Follow the instructions at https://developer.mbed.org/handbook/Windows-serial-configuration to install the device driver.

ARMmbed are partners with the BBC on the Micro:bit project.

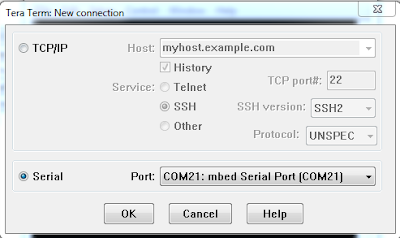
The connection from any terminal can be created using the following settings
  • Serial port : COM port that says “mbed Serial Port”
  • Baud rate: 115200.
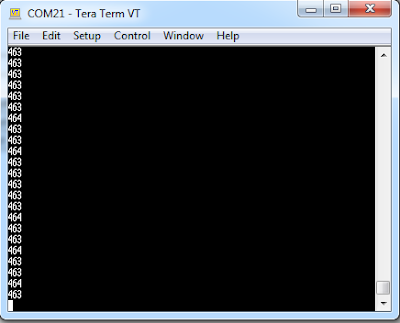
Any terminal will then list the data being sent from the Micro:bit

Selecting serial port

Setting baud rate

Viewing the data
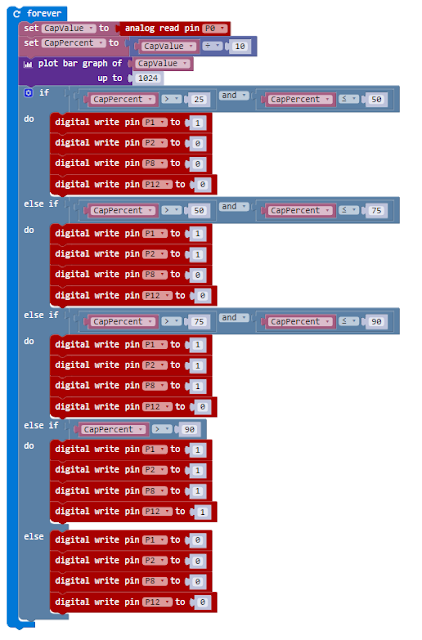
To get the Micro:bit to send the data a new application was written. Using the Code for Microbit site and the block editing tooling available on it, each time led.plotBarGraph is called, the value is also written to the serial output.

CapacitorChargeSerialSend application

If you are using Chrome their is an easy way to capture the data within the coding tool.

You can use the Micro:bit extension to get serial data streaming in the editor.

  1. Install the Extension for BBC micro:bit on the Chrome Web Store.
  2. Restart Chrome and open the web editor
  3. The serial data will show below the simulator

Microsoft Micro:bit extension

LogView

The log view will automatically start to collect and organize the data it detects. Simply click on the log view to open the various options to export the data. The simplest option is to download the data as a CSV file. This file can easily be opened in programs like Office Excel.

In the data export dialog, there is another option to upload the data to the Azure cloud. This allows to upload small amounts of data without any kind setup. The data can be accessed via web services or directly from Office Excel.


Captured capacitor charge / discharge curves

Hopefully this gives you a test of what can be achieved easily with the BBC Micro:bit.

I will be following up with other articles in the future on this single board computer